The most popular 3D modeling tool is Blender 3D. It is an amazing software that allows you to model 3D objects.

Blender 3D- A 3D modeling tool
You may wonder: What is a game engine developer doing with a 3D modeling tool?
The answer may surprise you. My game engine currently imports 3D modeling data from Blender and loads them into the GPU (Graphics Processing Unit). The data which I'm most interested from a 3D model are:
- Vertices Positions of the 3D model
- Normal Position of the 3D model
- U-V coordinates
In order for me to import these data into the engine, I had to develop a script which extracts these data. This script is commonly called a Digital Asset Exporter and I had to develop it in Blender-Python scripting language.

3D model with the vertices
Unfortunately, there are very few Blender scripting tutorials. Furthermore, the Blender API is not very user friendly. I wasted so much time figuring this out that I want to share my knowledge with you.
So, I'm going to teach you how to extract the following set of data from a 3D model using Blender scripting:
- Vertices
- Normals
- U-V Coordinates
- Texture filename
By the end of this tutorial, you should have in your hands a small Digital Asset Exporter that you can use to extract 3D modeling information from an object.
Developing a Digital Asset Exporter
Step 1. Open Blender from the Terminal
The best way to develop a script in Blender is to open it through the Terminal instead of by clicking on its icon. When you open Blender 3D through the Terminal, the terminal serves as the Output debug window.
Locate Blender in your Application folder and Right-click on the icon.

Click on Show Package Content

Next, click on the Contents folder and then click on MacOS. Finally, Click on blender.

This action should fire up Blender 3D along with the Terminal.
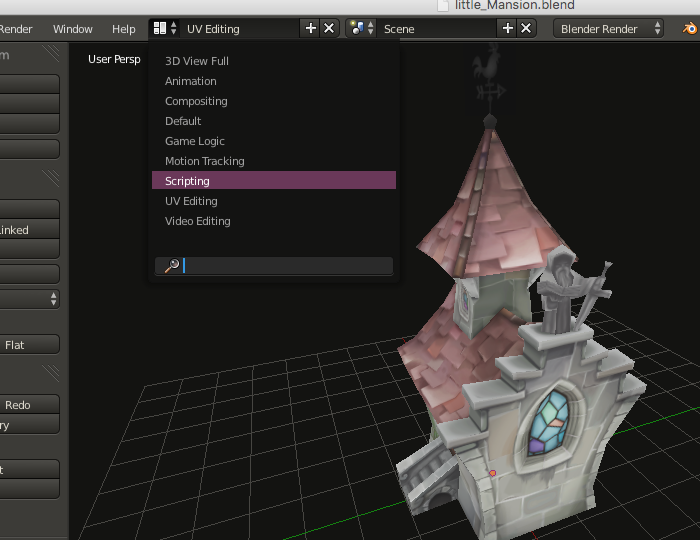
Step 2. Switch to the Scripting View
Blender 3D normally starts up with:
- The Default view as active
- A Cube model in the center of the application
The Default view is perfect when you want to create a model. Since you want to develop a script, you need to switch to the Scripting view as shown below.
The Scripting View should now look as shown below.

Blender 3D Script View
Step 3. Create a New script page
Locate the lower-bottom section of the application and click on New. This action should bring up a scripting page.

Step 4. Import the bpy blender files
The bpy file gives you access to the Blender API.
Type the following code snippet in the scripting page:
import bpy
Since we are going to use Python, let's set up the main function.
Type the following code snippet:
import bpy

def main():
    #As a test print something
    print("Hello World!")

if __name__ == '__main__':
    main()
Your code in blender should look like this:

If you click on Run Script, the text Hello World! should show up in your terminal.

Step 5. Understand the Blender API
Let's get confortable using the Blender API. Let's do a simple test where you print out the name and vertices of an object.
Blender allows you to control 3D models through its API. You can get the name of a 3D model, orientation, position, etc. To do any of these operations you need to know the attributes/operators used in Blender.
Everything in Blender can be access through its context. For example if you want to access its scene, you would access its context and then its scene attribute:
#accessing a scene in blender
bpy.context.scene
If you want to access its first object in the scene, you would access it as follows:
#accessing an object in blender
bpy.context.scene.objects[0]
If you want to get the name of the object, you would access its name as follows:
#accessing the name of an object in the scene
bpy.context.scene.objects[0].name
As a matter of a test, let's print out the name of your object to the terminal:
import bpy

def main():
    #Print the name of an object
    name=bpy.context.scene.objects[0].name
    print(name)

if __name__ == '__main__':
    main()
Now, if you want to access the object's data, you would need to access its data attributes. For example, if you want to get the first vertex position of the object, you would access it as follows:
#Accessing the first vertex position of the object.
bpy.context.scene.objects[nameOfObject].data.vertices[0].co
Let's print the vertex position to the terminal:
import bpy

def main():
    #Print the name of an object
    name=bpy.context.scene.objects[0].name
    vertex=bpy.context.scene.objects[name].data.vertices[0].co
    print(vertex)

if __name__ == '__main__':
    main()
The Blender API can be a bit confusing at first. I was very confused with this API until I came across the Datablocks view. I recommend you to use it every time.
To access the Datablocks, locate the right-hand section of Blender and click on All Scenes and select Datablocks

Once in the Datablocks, navigate to Scenes->Objects->name
Hover your mouse next to the Name field and make note how Blender references this field in Python. (This is shown as a Tooltip.)
The path that you use in datablocks, is essentially the same path that you would use to access the name through the API. i.e., to get the name of an object in the datablock, you had to click on Scene, then on Objects and then on the Name field. In code this looks like this:
bpy.context.scene.objects[0].name
In the same manner, the vertices of the object can be found by going into the datablocks subtree and finding that this data is found under:
scene->object[name]->data->vertices[0].co
In code this looks like this:
#Obtaining the coordinate of a vertex of an object
bpy.context.scene.objects[nameOfObject].data.vertices[0].co
Step 6. Reading Vertices of a Model
Now that you understand the Blender API, let's write a script which will loop through every object, get its name and print out vertex positions, normals and U-V coordinates to the terminal.
The first thing you need to do is loop through all the objects in the scene (see line 1 below). Since you are interested only in 3D models and not in lights or camera models, you need to check if the object is of type mesh (line 2). Line 3 prints out the name of the model to the terminal. Line 4 loops through all the vertices of the model and prints them out to the terminal.
import bpy

def main():

    #1. Search for all objects in the  scene
    for models in bpy.context.scene.objects:

        #2. check if the object is a 3D mesh
        if(models.type=="MESH"):

            #3. get the name of the MESH
            name=models.name
            print("Name of Mesh: %s"%name)

            print("Vertex Position")
            #4. loop through each vertex and print it out each vertex
            for i,indices in enumerate(bpy.context.scene.objects[name].data.loops):
                vertices=bpy.context.scene.objects[name].data.vertices[indices.vertex_index].co
                print(vertices)


if __name__ == '__main__':
    main()
If you run the script, the output is sent to the terminal window as shown below:

The output format of the vertices is not very user friendly. Let's strip out the word Vector and fix the format output to something you can use in an application.
Let's first create a Model class which will contain all the attribute information about the model.
class Model:
    def __init__(self):
        self.vertices=[]
        self.normal=[]
        self.uv=[]
        self.index=[]
In the main code, we are going to create an instance of this class (Line 1). In line 7, we are going to store the vertices into the a member of the Model class, i.e. Model.vertices. In line 8 we print out the result to the terminal.
import bpy

#class for Model. This contains all the attributes of the model
class Model:
    def __init__(self):
        self.vertices=[]
        self.normal=[]
        self.uv=[]
        self.index=[]


def main():

    #1. create a Model object
    model=Model()

    #2. Search for all objects in the  scene
    for models in bpy.context.scene.objects:

        #3. check if the object is a 3D mesh
        if(models.type=="MESH"):

            #4. get the name of the MESH
            name=models.name
            print("Name of Mesh: %s"%name)


            #5. loop through each vertex and print it out each vertex
            for i,indices in enumerate(bpy.context.scene.objects[name].data.loops):

                #6. read the vertices
                vertices=bpy.context.scene.objects[name].data.vertices[indices.vertex_index].co


                #7. append the vertices to the class member of the Model class
                model.vertices.append(vertices);


            #8. Print all vertices
            print("<vertices>",end="")

            for i in range(0,len(model.vertices)):

                print("%f %f %f "%tuple(model.vertices[i]),end="")

            print("</vertices>")

if __name__ == '__main__':
    main()
The output format is shown in the terminal window:

The output format can now be parsed by a library such as tinyxml2 in your application.
Reading Normal data
To read the normal data you need to use the normal attribute of the 3D model. Line 8 shows how this is done with the Blender API. Line 9 saves this data into the Model class attribute. The output is then printed to the terminal as shown in line 11.
import bpy

#class for Model. This contains all the attributes of the model
class Model:
    def __init__(self):
        self.vertices=[]
        self.normals=[]
        self.uv=[]
        self.index=[]


def main():

    #1. create a Model object
    model=Model()

    #2. Search for all objects in the  scene
    for models in bpy.context.scene.objects:

        #3. check if the object is a 3D mesh
        if(models.type=="MESH"):

            #4. get the name of the MESH
            name=models.name
            print("Name of Mesh: %s"%name)


            #5. loop through each vertex and print it out each vertex
            for i,indices in enumerate(bpy.context.scene.objects[name].data.loops):

                #6. read the vertices
                vertices=bpy.context.scene.objects[name].data.vertices[indices.vertex_index].co

                #7. append the vertices to the class member of the Model class
                model.vertices.append(vertices)

                #8. read the normals
                normals=bpy.context.scene.objects[name].data.vertices[indices.vertex_index].normal

                #9. append the normals to the class member of the Model class
                model.normals.append(normals)


            #10. Print all vertices
            print("<vertices>",end="")

            for i in range(0,len(model.vertices)):

                print("%f %f %f "%tuple(model.vertices[i]),end="")

            print("</vertices>")

            print()
            print()
            #11. Print all normals
            print("<normals>",end="")

            for i in range(0,len(model.normals)):

                print("%f %f %f "%tuple(model.normals[i]),end="")

            print("</normals>")


if __name__ == '__main__':
    main()
The output terminal now shows the position of the normals.

Reading the UV Coordinates
To read the UV coordinates, you first need to check if a texture has been attached to the object. This is done by checking if uv_layers have been enabled (line 10). If the uv_layers are enabled, then we can loop through the UV coordinates (line 11). The UV coordinates are then stored in the model UV attribute (line 12). Finally, the UV data are printed on the terminal (line 15).
import bpy

#class for Model. This contains all the attributes of the model
class Model:
    def __init__(self):
        self.vertices=[]
        self.normals=[]
        self.uv=[]
        self.index=[]


def main():

    #1. create a Model object
    model=Model()

    #2. Search for all objects in the  scene
    for models in bpy.context.scene.objects:

        #3. check if the object is a 3D mesh
        if(models.type=="MESH"):

            #4. get the name of the MESH
            name=models.name
            print("Name of Mesh: %s"%name)


            #5. loop through each vertex and print it out each vertex
            for i,indices in enumerate(bpy.context.scene.objects[name].data.loops):

                #6. read the vertices
                vertices=bpy.context.scene.objects[name].data.vertices[indices.vertex_index].co

                #7. append the vertices to the class member of the Model class
                model.vertices.append(vertices)

                #8. read the normals
                normals=bpy.context.scene.objects[name].data.vertices[indices.vertex_index].normal

                #9. append the normals to the class member of the Model class
                model.normals.append(normals)


            #10. Check if the uv_layers have been enabled in the model properties
            if(bpy.context.scene.objects[name].data.uv_layers):

                #11. Loop through the UV coordinates
                for uvCoordinates in bpy.context.scene.objects[name].data.uv_layers.active.data:

                    #12. get uv coordinates of model

                    model.uv.append(uvCoordinates.uv)


            #13. Print all vertices
            print("<vertices>",end="")

            for i in range(0,len(model.vertices)):

                print("%f %f %f "%tuple(model.vertices[i]),end="")

            print("</vertices>")

            print()
            print()

            #14. Print all normals
            print("<normals>",end="")

            for i in range(0,len(model.normals)):

                print("%f %f %f "%tuple(model.normals[i]),end="")

            print("</normals>")

            print()
            print()

            #15. Print all uv coordinates
            print("<uv>",end="")

            for i in range(0,len(model.uv)):

                print("%f %f "%tuple(model.uv[i]),end="")

            print("</uv>")


if __name__ == '__main__':
    main()
If you run the code, the output terminal should show the UV coordinates.

Reading the indices of the model
There is a final bit of data which you may or may not need. In OpenGL, you can specify the order which vertices should be assembled. This is done by providing an index attribute. Line 10 shows how you get this attribute from the API. Line 17 shows how this data is printed in the output terminal
import bpy


#class for Model. This contains all the attributes of the model
class Model:
    def __init__(self):
        self.vertices=[]
        self.normals=[]
        self.uv=[]
        self.index=[]


def main():

    #1. create a Model object
    model=Model()

    #2. Search for all objects in the  scene
    for models in bpy.context.scene.objects:

        #3. check if the object is a 3D mesh
        if(models.type=="MESH"):

            #4. get the name of the MESH
            name=models.name
            print("Name of Mesh: %s"%name)


            #5. loop through each vertex and print it out each vertex
            for i,indices in enumerate(bpy.context.scene.objects[name].data.loops):

                #6. read the vertices
                vertices=bpy.context.scene.objects[name].data.vertices[indices.vertex_index].co

                #7. append the vertices to the class member of the Model class
                model.vertices.append(vertices)

                #8. read the normals
                normals=bpy.context.scene.objects[name].data.vertices[indices.vertex_index].normal

                #9. append the normals to the class member of the Model class
                model.normals.append(normals)


                #10. Get the indexes that may be used in the GPU
                model.index.append(i)

            #11. Check if the uv_layers have been enabled in the model properties
            if(bpy.context.scene.objects[name].data.uv_layers):

                #12. Loop through the UV coordinates
                for uvCoordinates in bpy.context.scene.objects[name].data.uv_layers.active.data:

                    #13. get uv coordinates of model

                    model.uv.append(uvCoordinates.uv)


            #14. Print all vertices
            print("<vertices>",end="")

            for i in range(0,len(model.vertices)):

                print("%f %f %f "%tuple(model.vertices[i]),end="")

            print("</vertices>")

            print()
            print()

            #15. Print all normals
            print("<normals>",end="")

            for i in range(0,len(model.normals)):

                print("%f %f %f "%tuple(model.normals[i]),end="")

            print("</normals>")

            print()
            print()

            #16. Print all uv coordinates
            print("<uv>",end="")

            for i in range(0,len(model.uv)):

                print("%f %f "%tuple(model.uv[i]),end="")

            print("</uv>")

            print()
            print()

            print("<index>",end="")

            #17. Print out the indices
            for i in model.index:
                print("%d "%i,end="")

            print("</index>")

            print()


if __name__ == '__main__':
    main()
You now have at your disposal a nice little tool that can read important 3D data from any blender 3D object. You may wonder, so what's next? The data above will normally reside in a file, which you would include in your application. Your application can then use a library such as tinyxml2 to parse these data and transfer it into an array or vectors.
You can download the code from my github page.
I hope this tutorial was helpful. Don't forget to subscribe to my newsletter.
